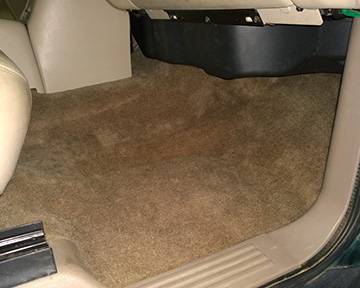
ACC Original Material Replacement Carpet Flooring
Note: | You have selected VINYL material. Sample picture below is displayed with CARPET material. See material details below. |
Select Vehicle
![](https://cfg.accmats.com/api/images/warning.png)
![](https://cfg.accmats.com/api/images/acc-logo.png)
The ACC Story
ACC was born in 1977, and we've been on an epic journey ever since. From our beginnings as an Auto Trim Business to becoming the world's largest manufacturer of Automotive Flooring products, we've tried to stay true to our core principles. Deliver exceptional products made in the USA. Strive every day to be better than the day before. Do it faster than anyone. We are very grateful to the millions of customers who trust us each year and for joining us on this awesome ride. We hope that you'll continue to be a part of our story.
Why ACC
Automotive Flooring is what we do. It's all we do. It's not a side business. It's not one of numerous other product lines that could divide our attention. It's all we focus on every day. We know you and your vehicle deserve that.
Our dedicated team is our biggest asset. These long time employees insure the products we produce every day are of the highest quality and made with the best craftsmanship. From our engineers, to the materials and equipment we use, to our dedicated staff, we are relentless in our pursuit to manufacture a product that we all are proud of.
![](https://cfg.accmats.com/api/images/made-in-usa.png)
Instructions may vary for multi-piece sets
- Remove new product from box. Lay flat and pop contours back into place. Allow a few hours for product to relax back into proper shape. Check material for accuracy.
- Compare new and old carpet. (New product may have excess material on outer edges.)
- In some applications it may be necessary to use old carpet as a template for console cuts.
- IMPORTANT: Fold new product in half from front to rear. Place in vehicle lining up molded contour to seat risers or any other identifiable starting point on both driver and passenger sides. Once fitted, continue installation.
- Roll product forward making any cuts needed for brackets, shifters and heater vents etc. while maintaining proper alignment on seat risers or other starting point.
- Next, cut in center at firewall to allow product to go underneath dash.
- Continue same procedure for remainder of installation – working your way to outer edges.
- Once product is properly fitted you are now ready to do the final trimmings on outer edges, seat belts and holes etc.
Note: Applying adhesive to hold product in place is generally not necessary. If desired, only apply a light brush or spray adhesive after correct dry fit has been obtained.
Videos can be found at this link: ACC
Details
- FGO
- FGO
- Auto Custom Carpets, Inc.
- New
Write the First Review!